Looking to insert or embed iSpring content into your WordPress site? In this article, we’ll show you how easy it is to publish content from iSpring as a .zip file and upload it to your WordPress website.
(Note: It doesn’t matter which version of iSpring or product you’re using. The steps are very similar.)
Applies to:
iSpring Suite 10
iSpring Suite 9
iSpring Suite 8
iSpring Suite 7
iSpring Free 9
iSpring QuizMaker
iSpring Page
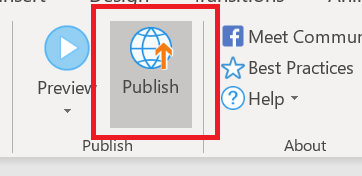
Step 1
Open your course in PowerPoint, click on the iSpring menu, and click Publish:
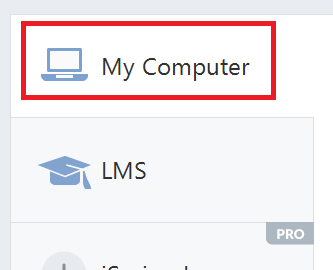
Step 2
Click on My Computer. The Wordpress Plugin that we’re going to use only needs your published .zip file. This makes it really easy to upload your content to WordPress.
Step 3
Click on Publish at the bottom of the window:

Step 4
After publishing is complete, click on ZIP and save the file on your machine to a location you will remember:
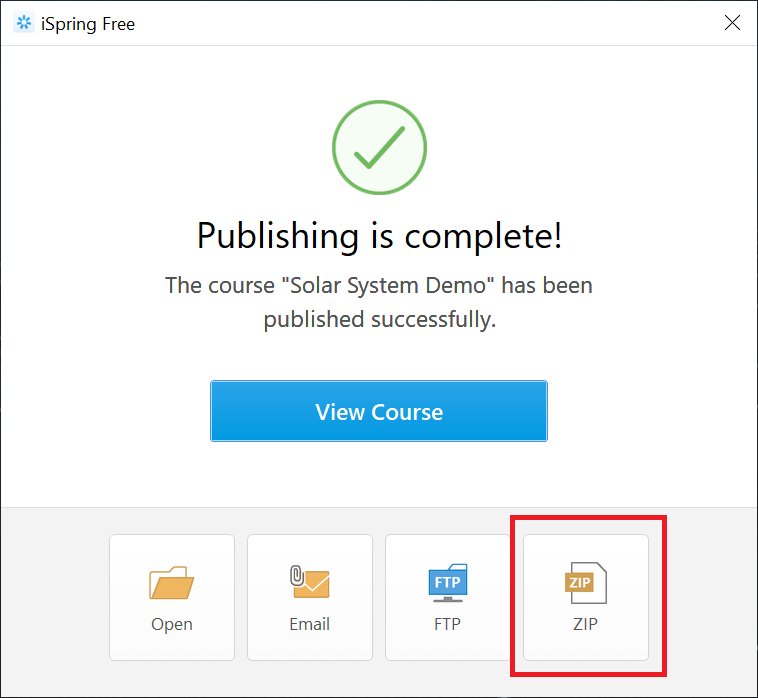
You’ll now have a single .zip file that we’ll upload into WordPress.
Step 5
Login as an admin into your WordPress site.
Step 6
Click on Plugins > Add New > Click on Upload Plugin
Step 7
Buy and manually install the “Insert or Embed e-Learning Content into WordPress Plugin” plugin file from: https://www.elearningfreak.com
Step 8
After installing and activating the plugin, create a new Post or Page in WordPress.
Step 9
If you’re using the Gutenberg editor, you’ll see an e-Learning Block. Click on the Upload button to start the upload process.
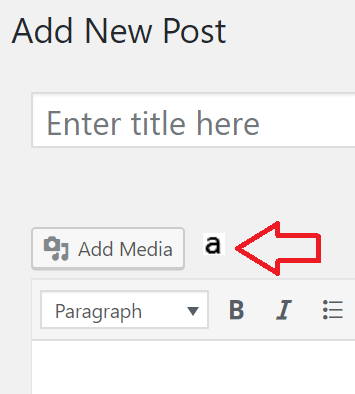
If you’re using the Classic Editor, the plugin will add a new toolbar icon (the letter ‘a’) next to the ‘Add Media’ button on the Edit Post and Edit Page pages. Click on that icon to start the upload process.
Step 10
Click on the “Choose Your ZIP File” or “Upload” button and then select the .zip file that you published earlier from iSpring Free, iSpring Suite, or iSpring QuizMaker. Click on the Upload button.
Step 11
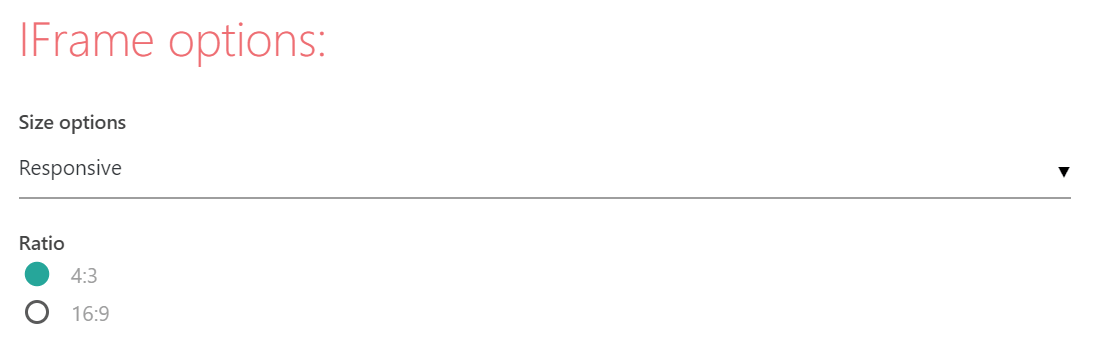
After the upload completes, select either IFrame, Lightbox, Link that opens in a new window, or Link that opens in the same window.
If you select IFrame, we recommend choosing to insert it as a Responsive IFrame in the IFrame Options section. This ensures that your content looks great no matter what theme you’re using.
If you select Lightbox, be sure to select the option to Disable Scrollbars.
Step 12
After selecting other available options, click on Insert Into Post. A small shortcode is inserted into your post or page. Click on Preview and enjoy seeing your iSpring content displayed perfectly on your WordPress website.
That’s it! You’ve successfully uploaded your Articulate iSpring course into your WordPress website.
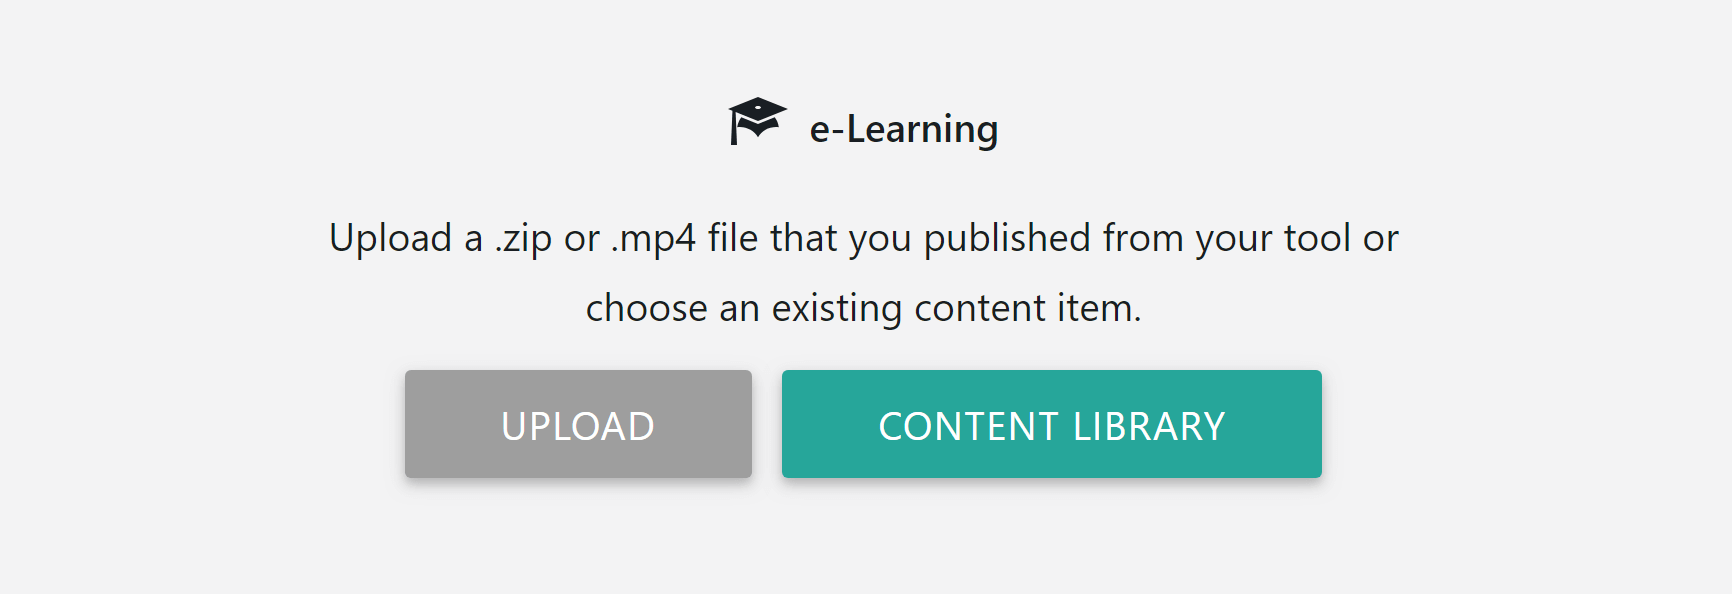
Pro Tip: If you don’t like how your content looks, there’s no need to re-upload it. Simply click on the ‘a’ again & then click on Content Library. You’ll see all of the content that you’ve already uploaded. Just click on the content you want to re-insert, select the new options, and insert it again.
Tags: iSpring WordPress Plugin
Article Last Updated August 14th, 2019

