Looking to publish Articulate Storyline xAPI content also known as Tin Can? In this article, we’ll show you how easy it is to publish content from Articulate Storyline as a .zip file and upload it to your LMS / LRS.
First off, what is xAPI?
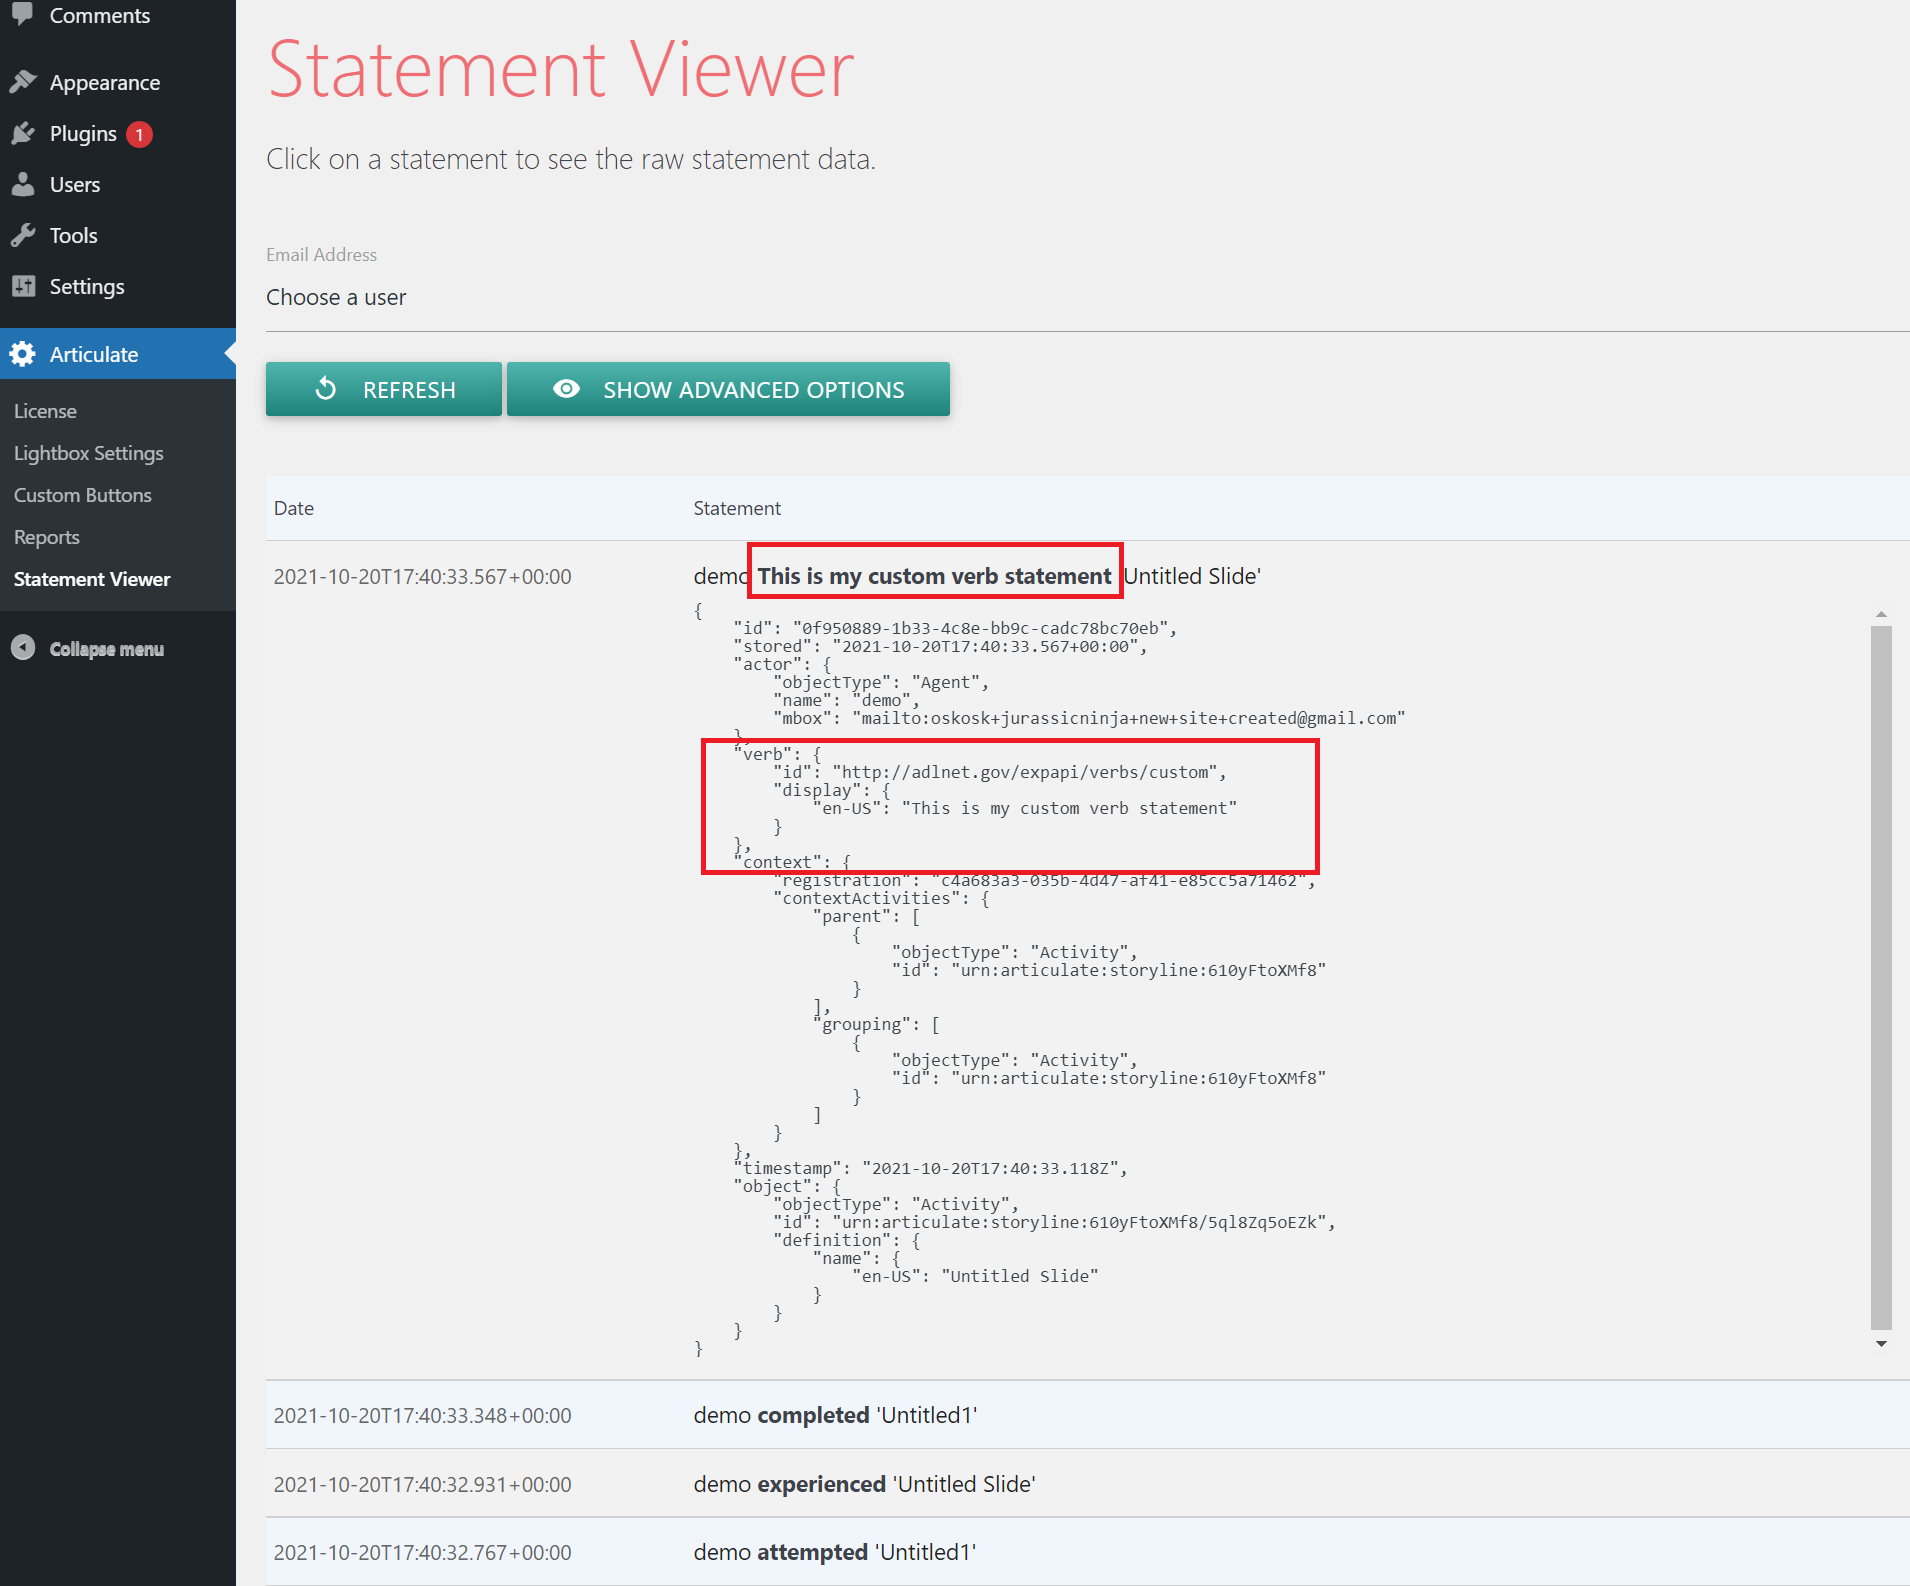
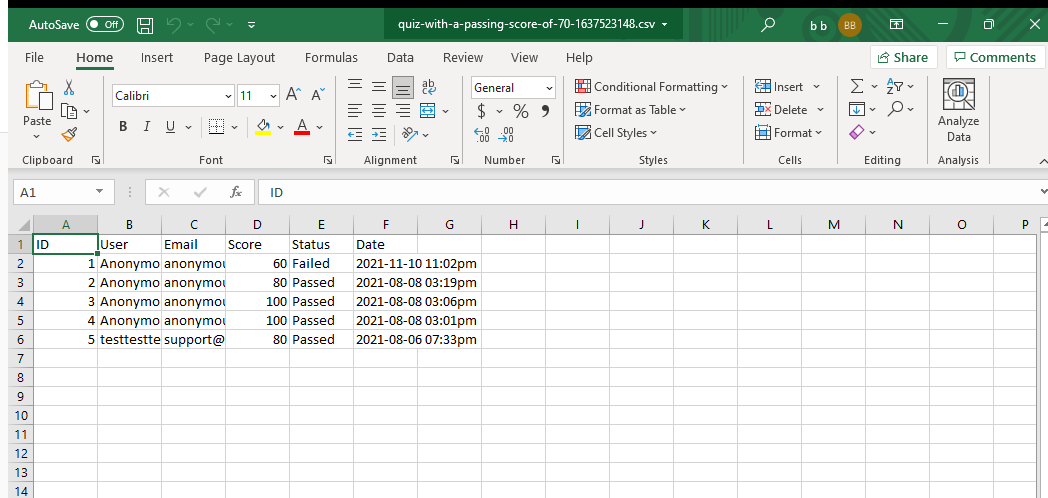
The Experience API (we’ll call it xAPI from here on out), is a specification that allows learning content (built by tools like Articulate Storyline & Rise) to speak to learning systems in a manner that records and tracks all types of learning experiences. These learning experiences are recorded and stored in a Learning Record Store (LRS for short). LRSs exist inside of a traditional learning management system or can be used on their own. For example, the WordPress plugin from elearningfreak.com acts like an LRS to record statements and display those statements in their raw format (JSON) in the Statement Viewer:
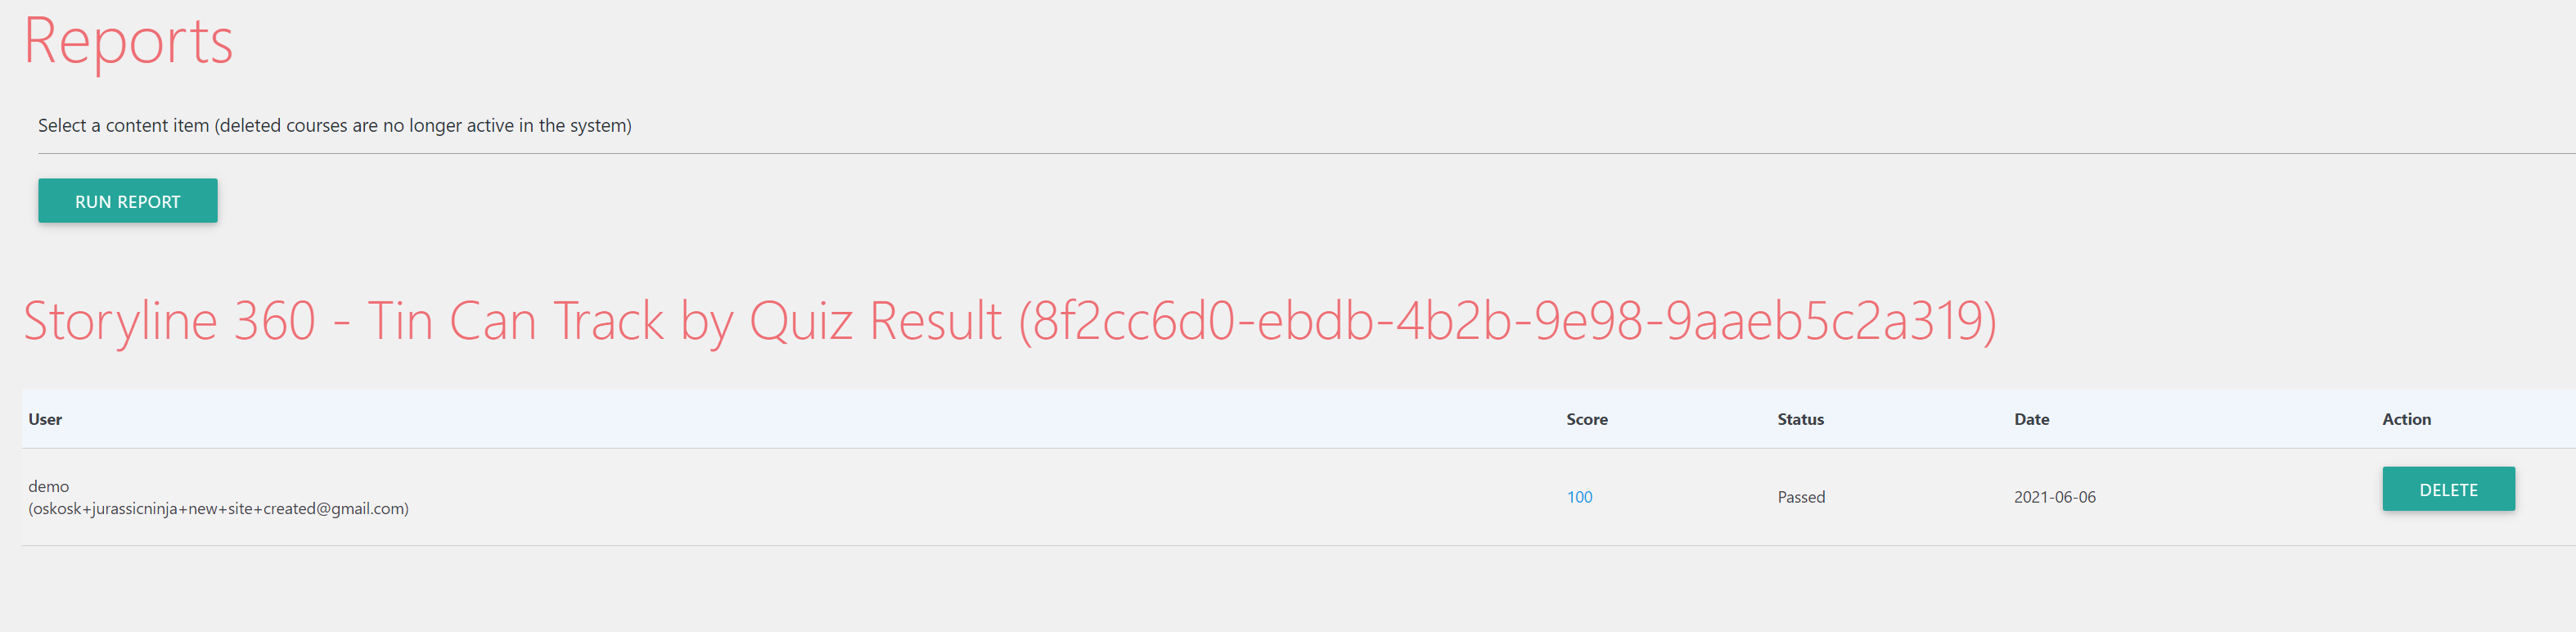
Similar to a traditional LMS, the plugin from elearningfreak.com can also run reports from the statement data to give insights on your user’s progress:
Why use xAPI instead of SCORM?
SCORM is a very outdated spec and should no longer be used if you’re publishing to an LMS that supports xAPI. Most authoring tools on the marketing include Articulate Storyline and Rise support the xAPI spec. If you’re interested in learning more about each spec like SCORM 1.2, SCORM 2004, and AICC, check out this article: https://www.elearningfreak.com/how-to-explain-aicc-scorm-12-and-scorm-2004-to-anyone/
Now that you know what xAPI is and the benefits of publishing to xAPI instead of other standards like SCORM and AICC, let’s jump into publishing Storyline xAPI content.
Here’s the steps:
(Note: It doesn’t matter which version of Storyline you’re using. The steps are very similar.)
Applies to:
Articulate Storyline 360
Articulate Storyline 3
Articulate Storyline 2
Articulate Storyline 1
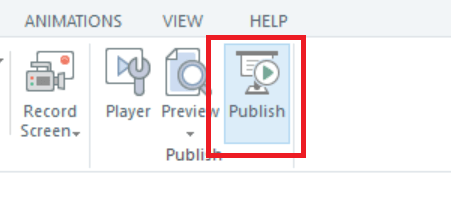
Step 1
Open your course in Storyline and click Publish:
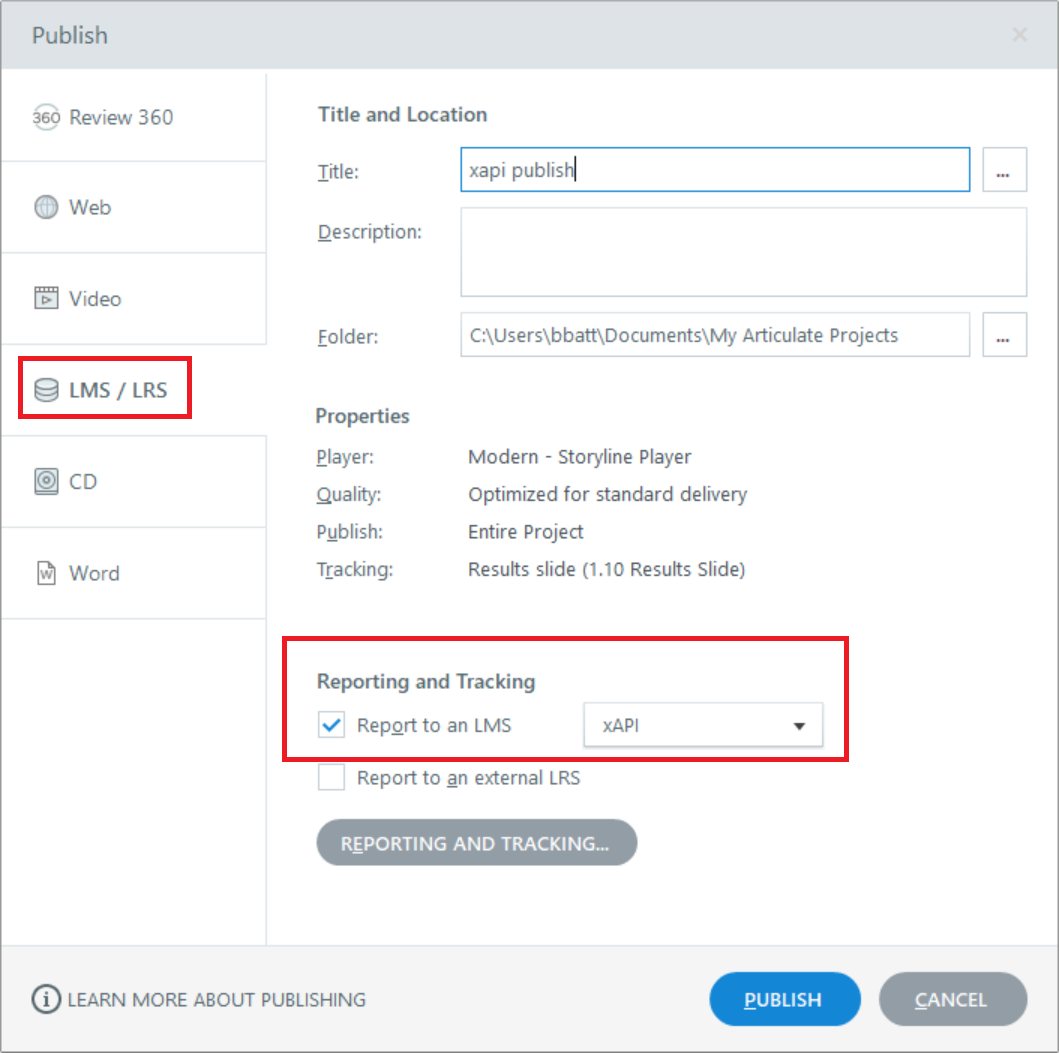
Step 2
Click on LMS / LRS. The LMS / LRS that we’re going to use is the elearningfreak WordPress Plugin because it supports xAPI. Then, choose xAPI in the dropdown under Reporting and Tracking like this:
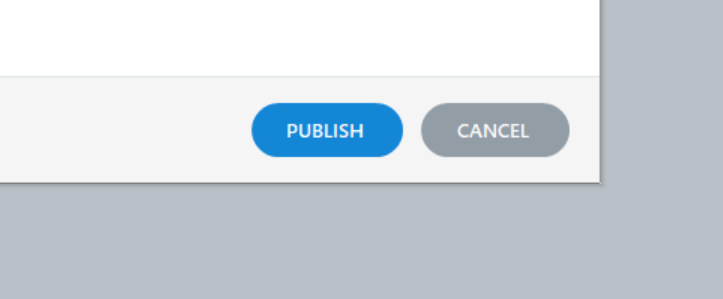
Step 3
Click on Publish at the bottom of the window:
Step 4
After publishing is complete, click on ZIP and save the file on your machine to a location you will remember:
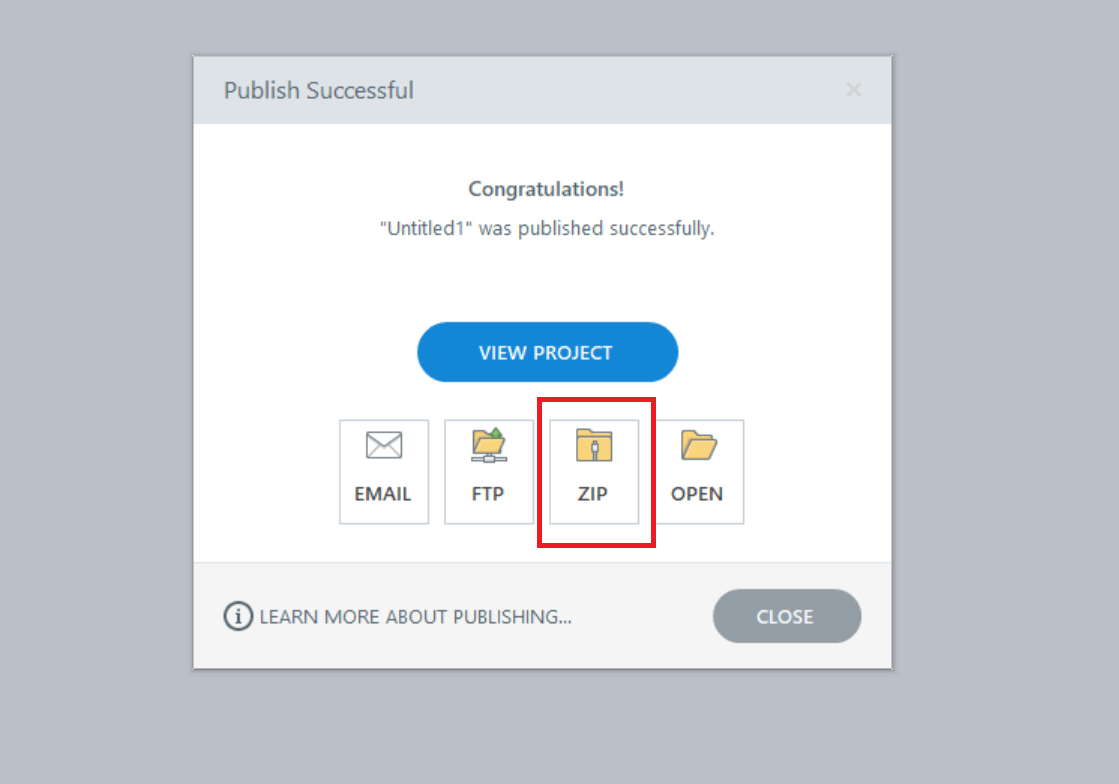
You’ll now have a single .zip file published to xAPI that we’ll upload into your WordPress LMS / LRS. For the purposes of this guide, we’re using the elearningfreak WordPress Plugin because it supports xAPI.
Step 5
Login as an admin into your WordPress site.
Step 6
Click on Plugins > Add New > Click on Upload Plugin
Step 7
Manually install the “Insert or Embed Articulate Content into WordPress Plugin” plugin file from: https://www.elearningfreak.com
Step 8
After installing and activating the plugin, create a new Post or Page in WordPress.
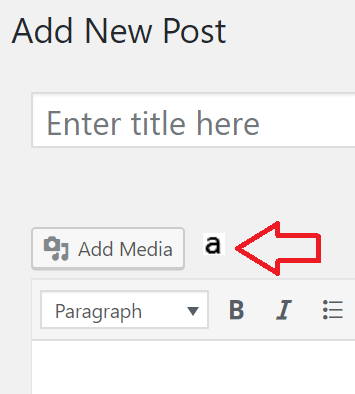
Step 9
If you’re using the Gutenberg editor, you’ll see an e-Learning Block:
The plugin will add a new toolbar icon (the letter ‘a’) next to the ‘Add Media’ button on the Edit Post and Edit Page pages. Click on that icon to start the upload process.
Note: elearningfreak works with any WordPress page builder. There are a lot of screencasts available on YouTube here: https://www.youtube.com/c/elearningfreak/videos
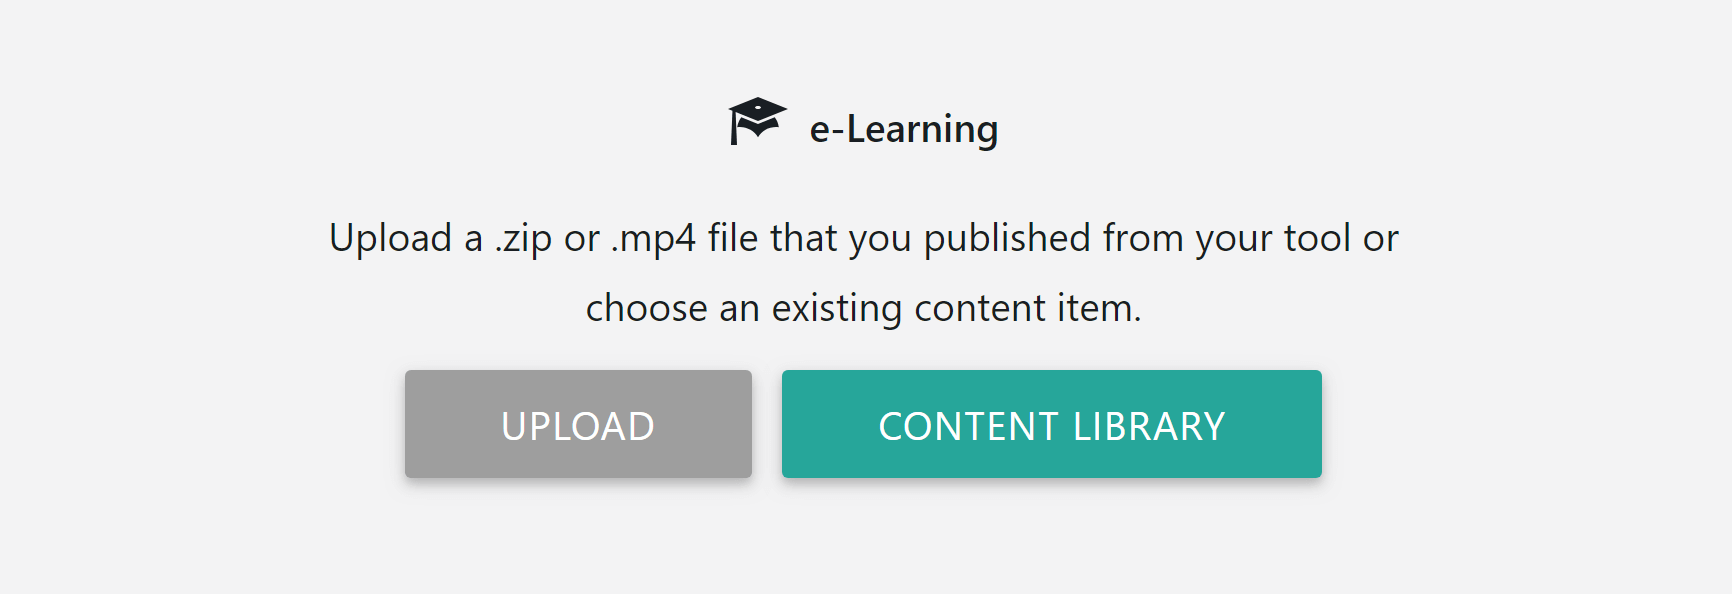
Step 10
Click on the “Choose Your ZIP File” or “Upload” button and then select the .zip file that you published earlier from Storyline. Click on the Upload button.
Step 11
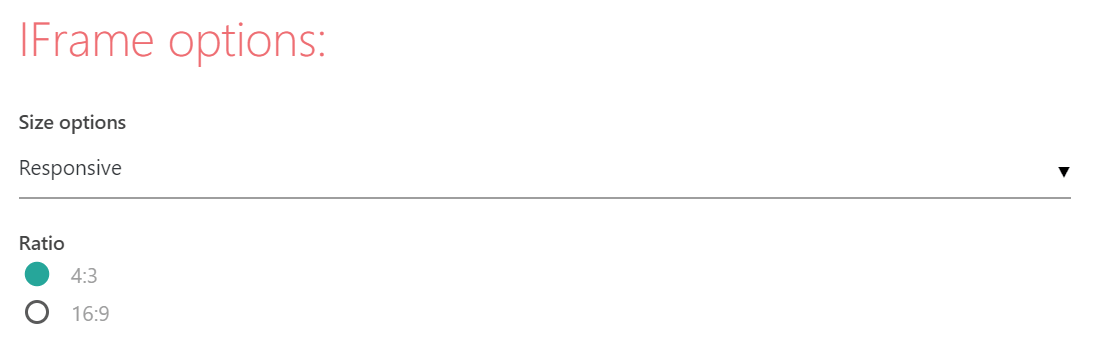
After the upload completes, select either IFrame, Lightbox, Link that opens in a new window, or Link that opens in the same window.
If you select IFrame, we recommend choosing to insert it as a Responsive IFrame in the IFrame Options section. This ensures that your content looks great no matter what theme you’re using.
If you select Lightbox, be sure to select the option to Disable Scrollbars.
Step 12
After selecting other available options, click on Insert Into Post. A small shortcode is inserted into your post or page. Click on Preview and enjoy seeing your Storyline xAPI content displayed perfectly on your WordPress website.
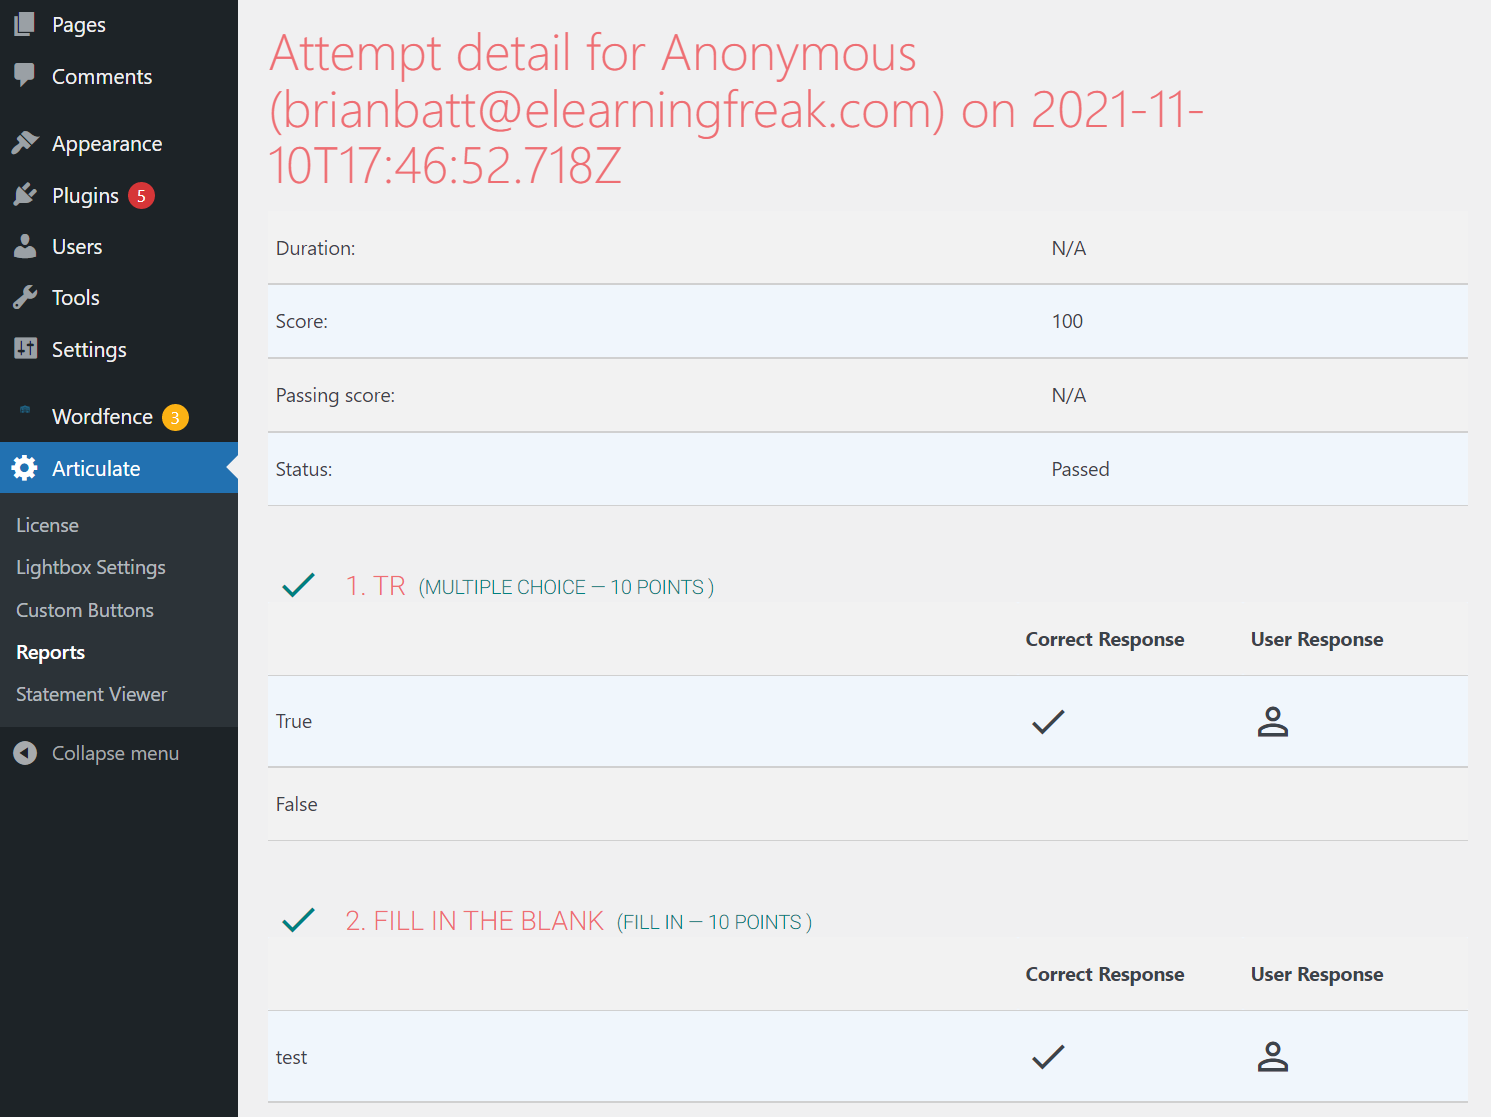
That’s it! You’ve successfully uploaded your Articulate Storyline course to your WordPress website. Your Storyline xAPI content will be tracked and reported on like content that’s been published to SCORM. You’ll see the raw xAPI statements in the Statement Viewer along with user scores and answers in the Reports section.
Pro Tip: If you don’t like how your content looks, there’s no need to re-upload it. Simply click on the ‘a’ again & then click on Content Library. You’ll see all of the content that you’ve already uploaded. Just click on the content you want to re-insert, select the new options, and insert it again.

